
什么是 XMLHttpRequest?
XMLHttpRequest(简称 XHR)是 JavaScript 中用于发送 HTTP 请求的原始 API,最早实现“AJAX 异步通信”的就是它。
AJAX 本质上就是用 XHR 发起的“异步 JS + 后端通信”
虽然现在有 fetch() 了,但很多老项目仍然在用。
XMLHttpRequest 常见用途
- 向服务器发送 GET / POST 请求(无刷新)
- 上传表单数据(包括文件)
- 获取 JSON 或文本响应
- 回调函数处理响应结果(没有 Promise)
最常用的 2 个方法
| 方法 | 作用 |
|---|---|
xhr.open(method, url) | 设置请求方法和目标地址 |
xhr.send(data) | 发送请求(GET 没有 data,POST 才有) |
XMLHttpRequest 基本使用流程
发起 GET 请求(获取 JSON)
<button onclick="loadData()">获取数据</button>
<pre id="result"></pre>

<script>
  function loadData() {
    const xhr = new XMLHttpRequest(); // 创建请求对象

    xhr.open("GET", "/api/data");     // 设置请求方法和地址
    xhr.send();                       // 发送请求

    // 当请求完成时触发(readyState === 4 表示完成)
    xhr.onload = function () {
      if (xhr.status === 200) {
        const data = JSON.parse(xhr.responseText);  // 解析 JSON
        document.getElementById("result").textContent = JSON.stringify(data, null, 2);
      } else {
        console.error("请求失败", xhr.status);
      }
    };

    // 处理请求失败(比如网络断开)
    xhr.onerror = function () {
      console.error("网络请求失败");
    };
  }
</script>
发送 POST 请求 + FormData(表单 + 上传)
<form id="myForm">
  <input type="text" name="username" placeholder="用户名">
  <input type="file" name="avatar">
  <button type="submit">提交</button>
</form>

<script>
  document.getElementById("myForm").addEventListener("submit", function (e) {
    e.preventDefault(); // 阻止表单默认提交行为

    const formData = new FormData(this); // 构造上传数据

    const xhr = new XMLHttpRequest();
    xhr.open("POST", "/upload"); // 请求地址
    xhr.send(formData);          // 发送表单

    xhr.onload = function () {
      if (xhr.status === 200) {
        console.log("上传成功:", xhr.responseText);
      } else {
        console.log("失败:", xhr.status);
      }
    };
  });
</script>
XMLHttpRequest 的几个关键属性:
| 属性 | 作用 |
|---|---|
xhr.responseText | 返回的字符串(常为 JSON) |
xhr.status | 状态码(200 成功,404/500 是错误) |
xhr.readyState | 请求的状态(4 表示完成) |
xhr.onload | 请求成功回调 |
xhr.onerror | 请求失败回调 |
和 fetch() 的对比理解
| 特性 | XMLHttpRequest | Fetch(推荐) |
|---|---|---|
| 写法 | 回调函数(多) | Promise / async |
| 文件上传 | 支持(FormData) | 支持 |
| JSON 响应解析 | 需手动 JSON.parse | 自动 res.json() |
| 错误处理 | 复杂 | 简单易懂 |
| 推荐度 | 了解即可 | 推荐使用 |
基于 ajax + python 前后端交互 demo
项目结构
project/
├── app.py           # Flask 后端
└── templates/
    └── index.html   # 前端页面
app.py(后端 Flask)
from flask import Flask, jsonify, render_template
app = Flask(__name__)
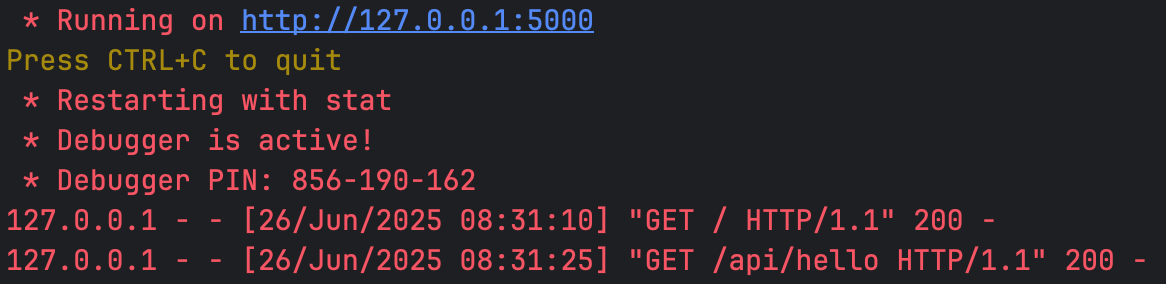
@app.route('/')
def index():
return render_template('index.html')
@app.route('/api/hello')
def hello():
return jsonify({"message": "你好,这是来自 Flask 的 AJAX 响应"})
if __name__ == '__main__':
app.run(debug=True)templates/index.html
<!DOCTYPE html>
<html lang="zh">
<head>
  <meta charset="UTF-8">
  <title>AJAX 示例</title>
</head>
<body>
  <h2>AJAX 请求示例</h2>
  <button onclick="loadData()">点击发送 AJAX 请求</button>
  <p id="result">响应结果将显示在这里</p>

  <script>
    function loadData() {
      const xhr = new XMLHttpRequest(); // 创建请求对象
      xhr.open('GET', '/api/hello');    // 设置请求类型和路径
      xhr.send();                        // 发送请求

      // 监听响应事件
      xhr.onload = function () {
        if (xhr.status === 200) {
          const data = JSON.parse(xhr.responseText); // 解析 JSON
          document.getElementById('result').textContent = data.message;
        } else {
          document.getElementById('result').textContent = '请求失败';
        }
      };

      // 错误处理
      xhr.onerror = function () {
        document.getElementById('result').textContent = '网络错误';
      };
    }
  </script>
</body>
</html>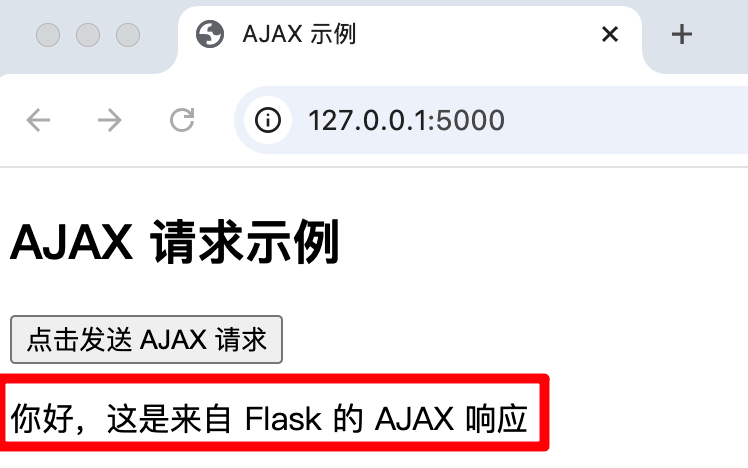

发布者:LJH,转发请注明出处:https://www.ljh.cool/42782.html